From Sunday services to youth conferences and fellowship breakfasts, The Worship helps you tell your members what is coming up and how many people will attend. This guide shows you how to create an event, turn on registration and see who has signed up.
Before you start
- Who can do this: church admins, and staff whose role includes event permissions (for example a "Church Secretary" role).
- What you need: the event name, date, start time and venue. A banner picture (JPG or PNG) is optional but makes the event stand out.
Step 1: Open Events and click "New event"
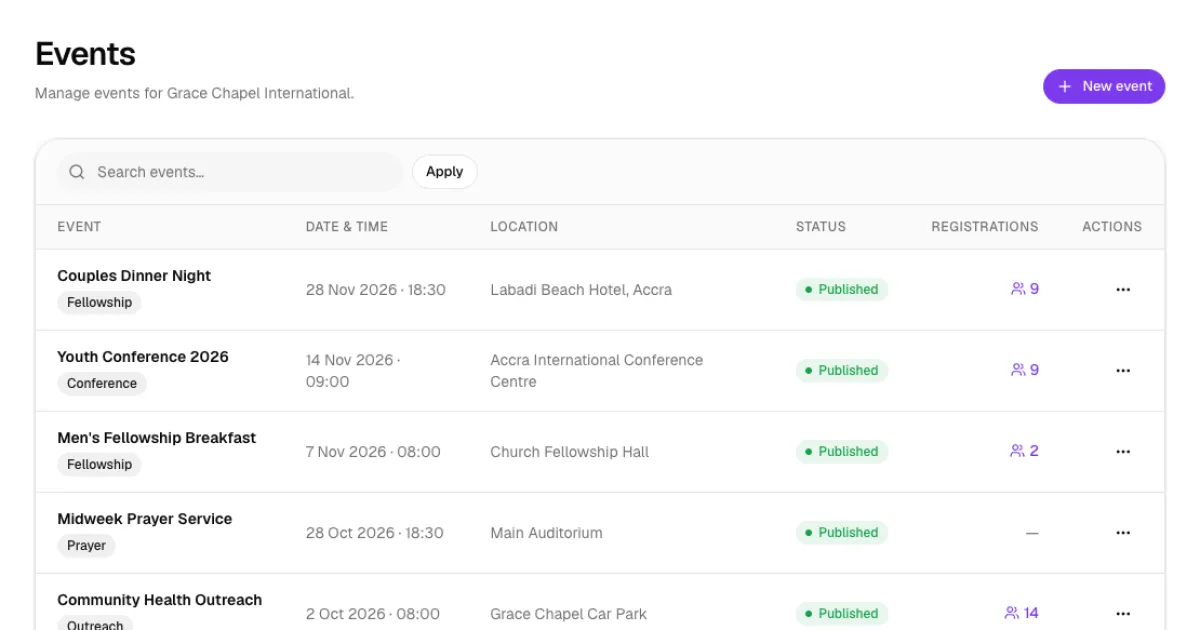
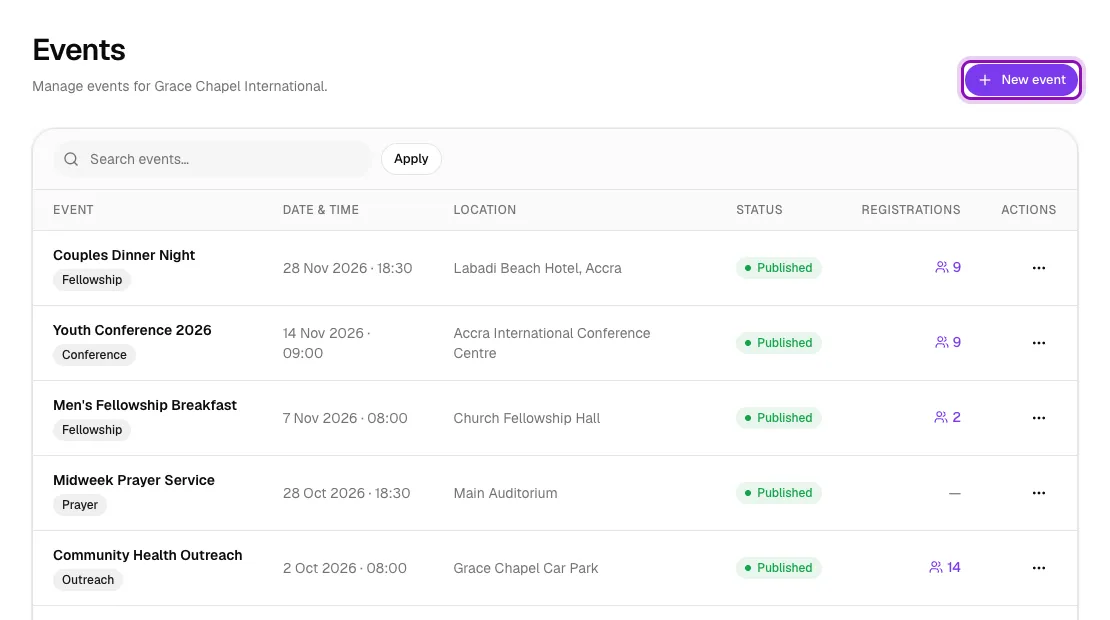
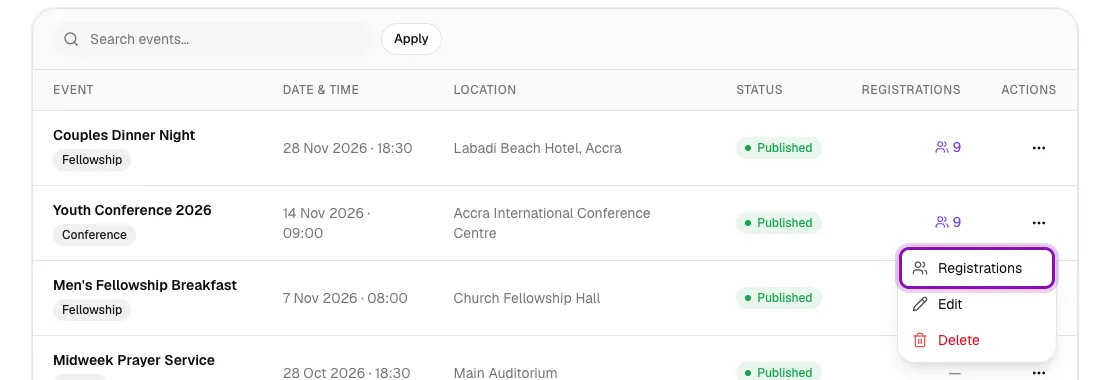
In the left menu, go to Content & Media → Events. The list shows every event with its date and time, location, status and the number of people registered. Click New event.
Step 2: Enter the event details
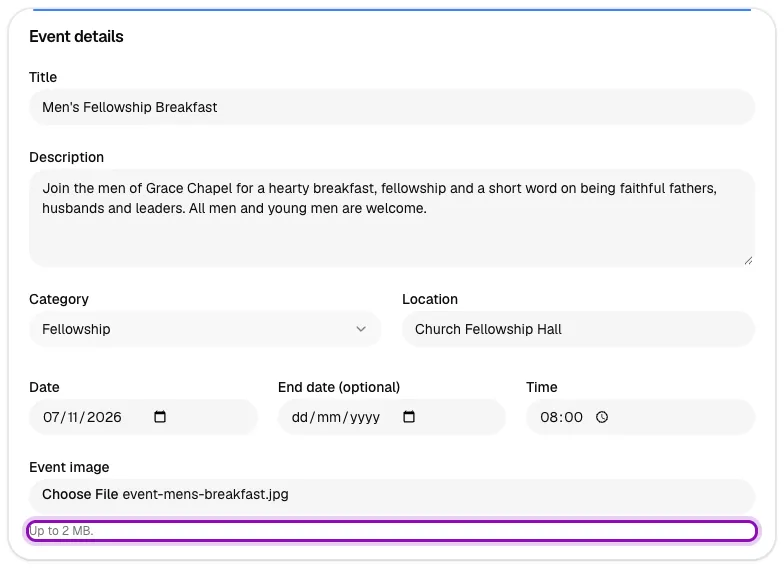
Fill in the Event details card:
- Title and Description: say what the event is and who it is for.
- Category: choose Worship, Youth, Outreach, Family, Study, Fellowship or Special.
- Location: for example "Church Fellowship Hall".
- Date and Time. For events that run over several days, also set an End date.
- Event image: click Choose File and pick a banner picture, up to 2 MB.
Step 3: Turn on registration and publish
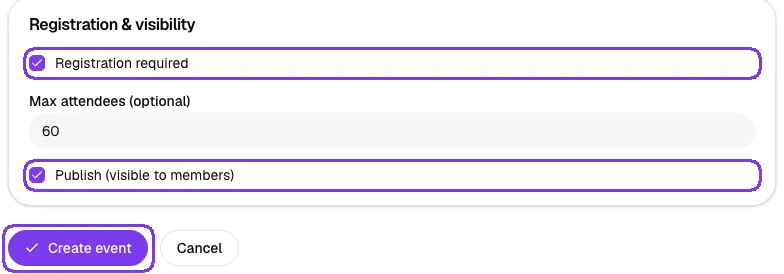
In the Registration & visibility card:
- Tick Registration required if you want people to sign up, for example for catering or seating.
- Optionally enter Max attendees. When that number is reached, the event shows as full. Leave it blank for unlimited places.
- Tick Publish (visible to members) so the event appears on your church page. Leave it unticked to save it as a Draft that members can't see yet.
- Click Create event.
Step 4: Check your event in the list
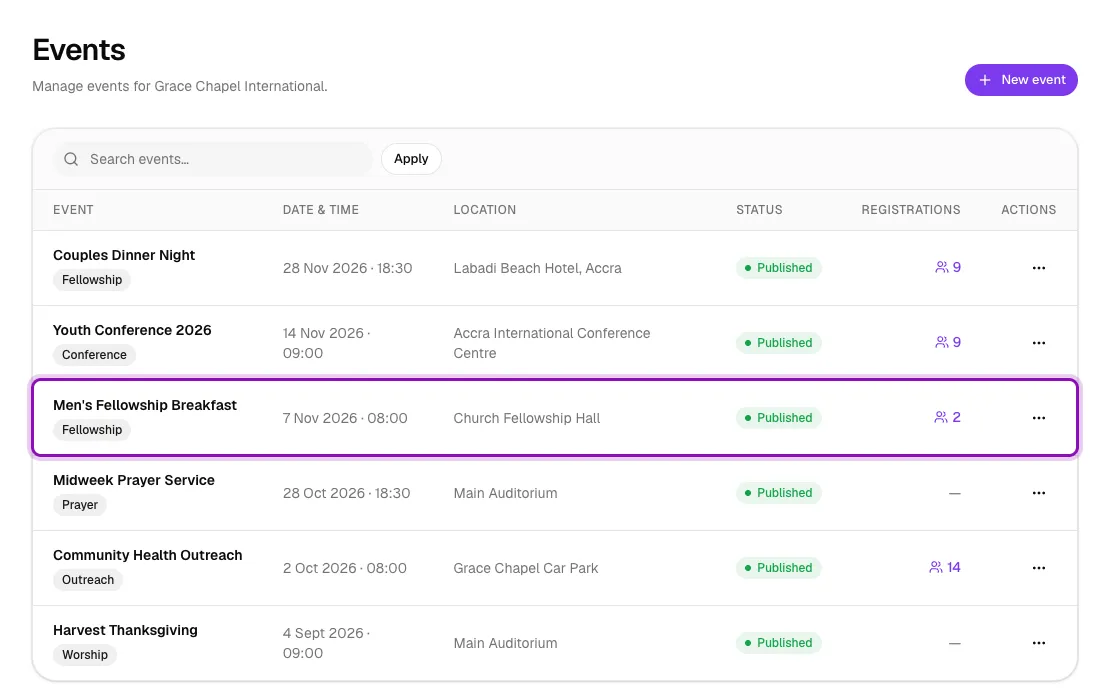
Your event now appears in the list, in date order, with the status Published (or Draft if you didn't tick Publish). The Registrations column shows how many people have signed up so far.
Step 5: How members register
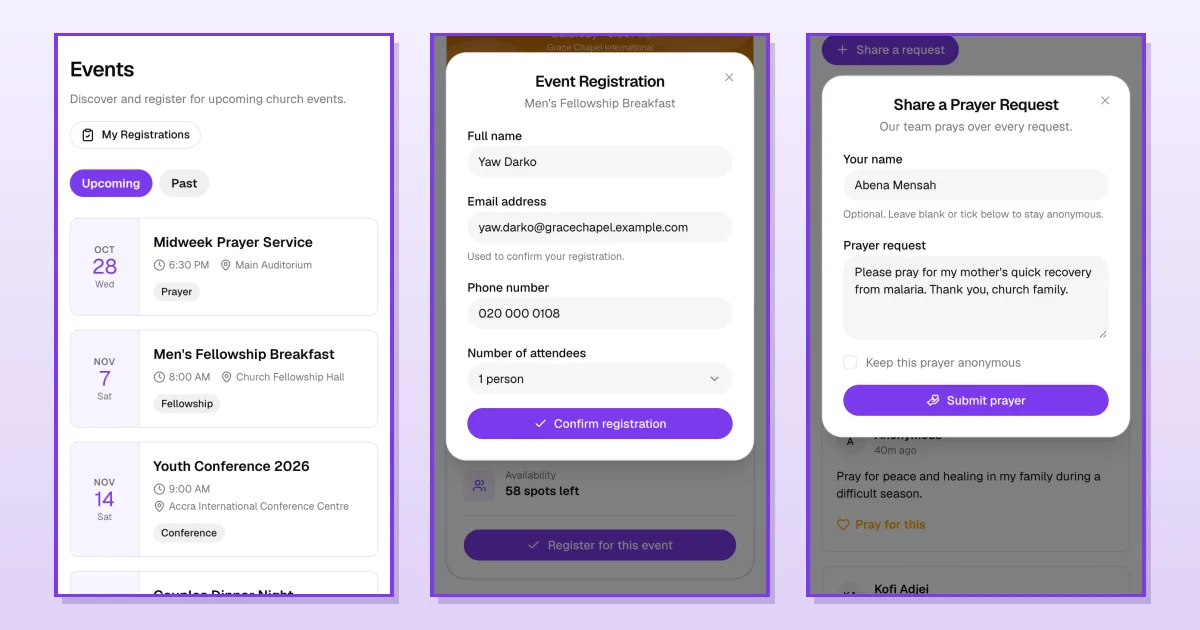
Members find the event under Events on your church page. Upcoming events are listed by date, and past events are under the Past tab.
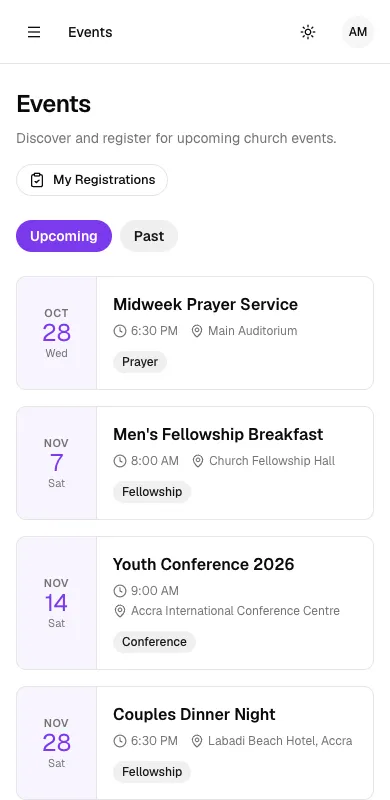
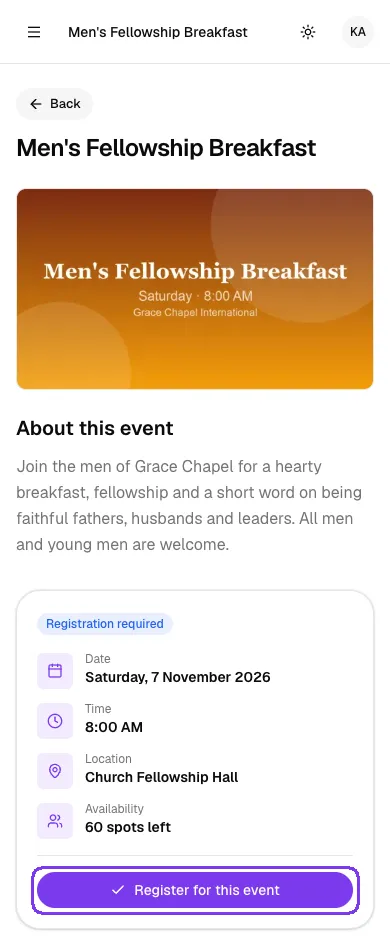
When a member opens the event, they see the banner, description, date, time, location and how many spots are left. They tap Register for this event. Members need to be signed in to register.
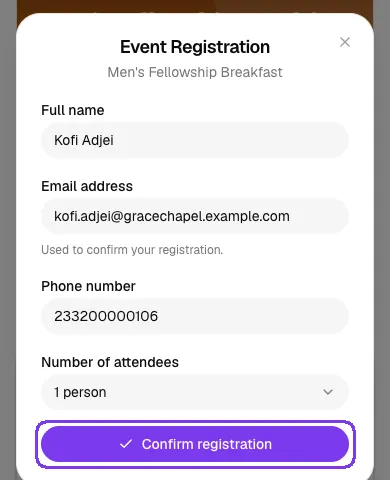
A short form opens with their name, email address and phone number already filled in. They choose the Number of attendees (for example if they are bringing family) and tap Confirm registration.
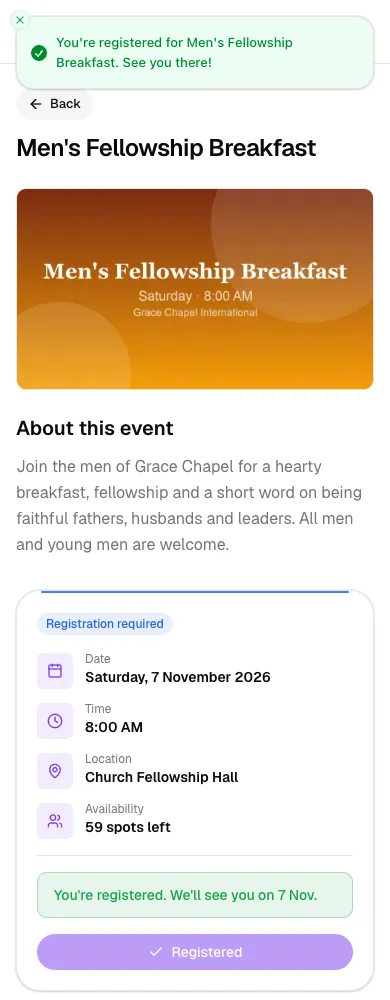
They see a confirmation, and the button changes to Registered. Members can find all their sign-ups under My Registrations on the Events page.
Step 6: See who has registered
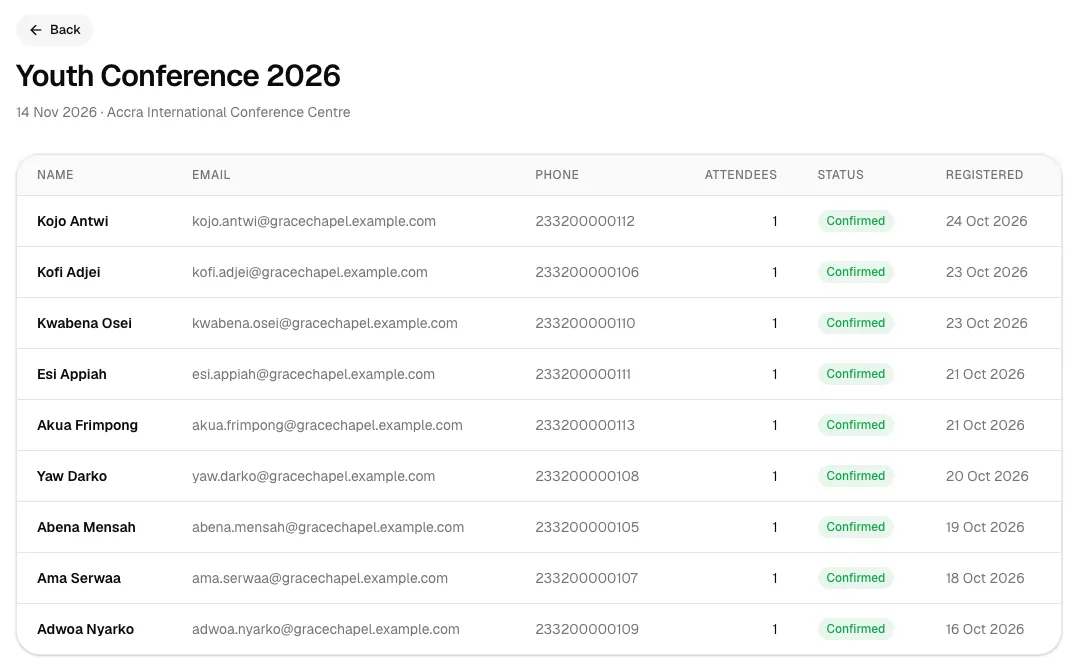
Back in the admin, click the ⋯ button next to an event and choose Registrations. You can also click the number in the Registrations column.
You will see each person's name, email, phone number, number of attendees, status and the date they registered. Use this list for catering numbers, name tags or follow-up calls.
Tips
- Create events a few weeks ahead, then announce them from the pulpit and in an announcement so members know to register.
- Use ⋯ → Edit to change the time or venue. Members always see the latest details.
- For services that do not need sign-ups, such as a midweek prayer meeting, leave Registration required unticked. Members can still tap I will attend.
- Use a wide banner picture (16:9) with the event name on it so it looks good on phones.
Troubleshooting
Members cannot see my event
Check its status in the Events list. If it says Draft, open ⋯ → Edit, tick Publish (visible to members) and click Save changes.
My event image won't upload
Event images can be up to 2 MB. Use a smaller JPG or PNG picture, for example by resizing it to about 1600 pixels wide before you upload it.
A member says the event is full
Once the Max attendees limit is reached, the button changes to Event full. Edit the event and raise the limit (or clear it for unlimited places) to open more spots.
A member gets "You are already registered for this event"
Each person can register once per event. To bring more people, they should choose a higher Number of attendees when registering.