Announcements are the quickest way to tell your whole church family what is happening, from a special service this Sunday to a building fund update. Notifications are short, timely messages you send to everyone or to one group, such as the choir. This guide shows you how to post, edit, hide and remove announcements, and how to send a notification and check who received it.
Before you start
- Who can do this: church admins, and staff whose role includes the announcement or notification permissions (for example a "Church Secretary" role).
- What you need: a short title and the message you want to share. Keep it brief; most people read announcements on their phones.
Step 1: Open Announcements
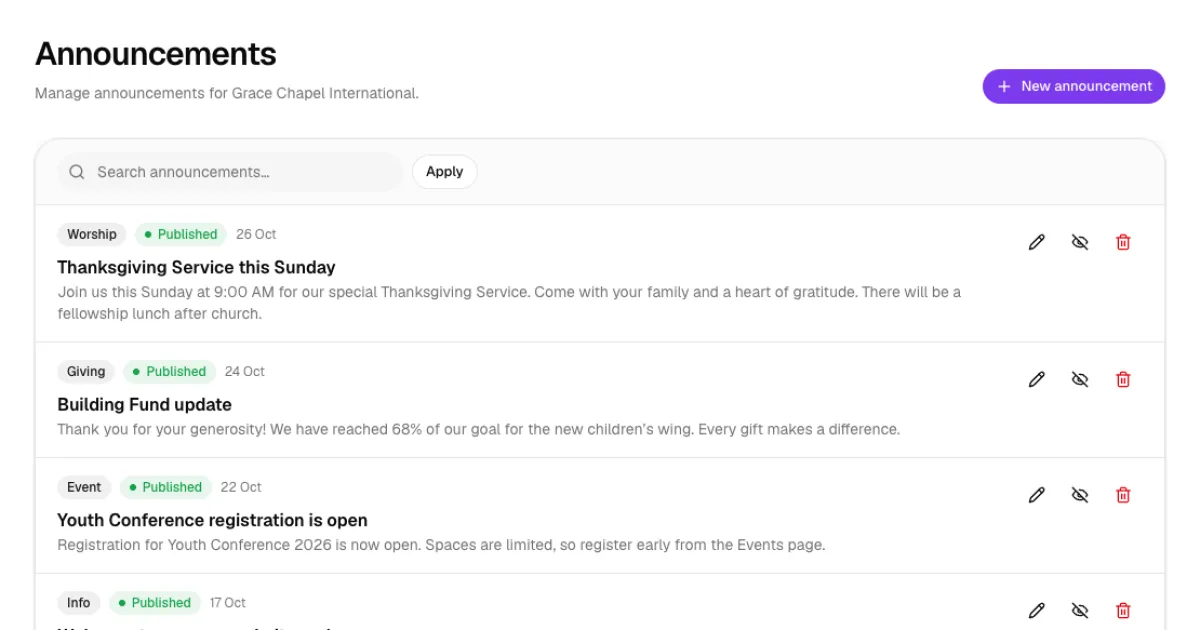
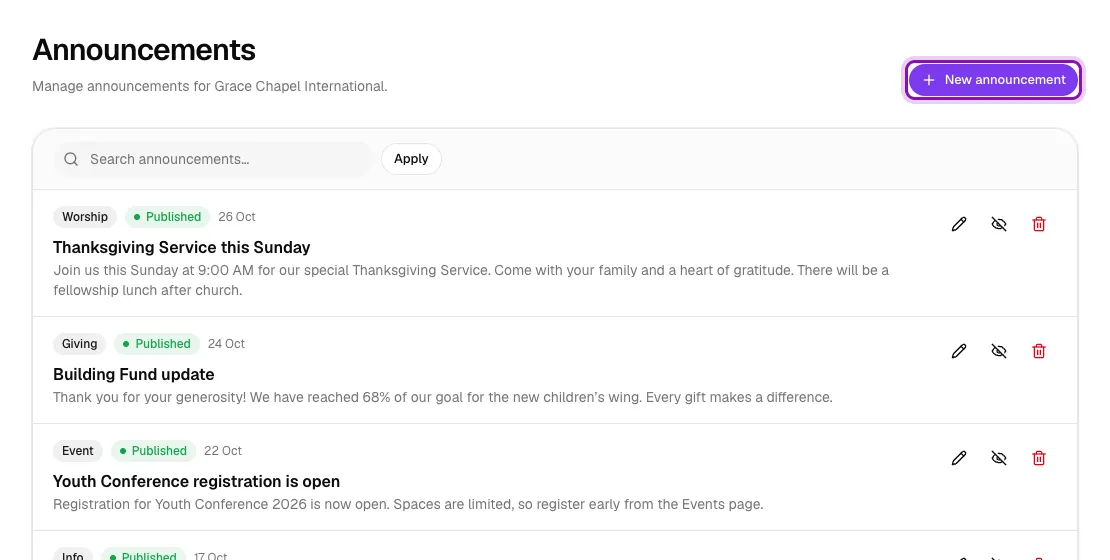
In the left menu, go to Communication → Announcements. You will see every announcement with its type, status and date. Click New announcement.
Step 2: Write your announcement
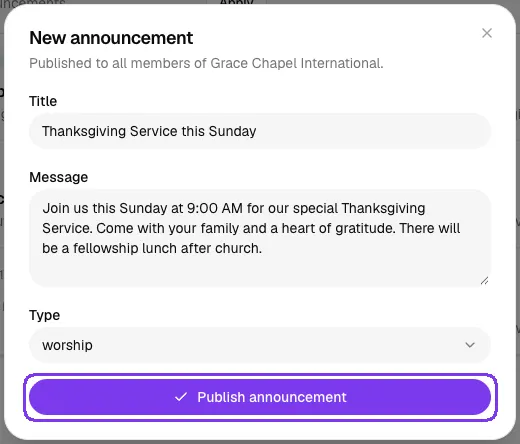
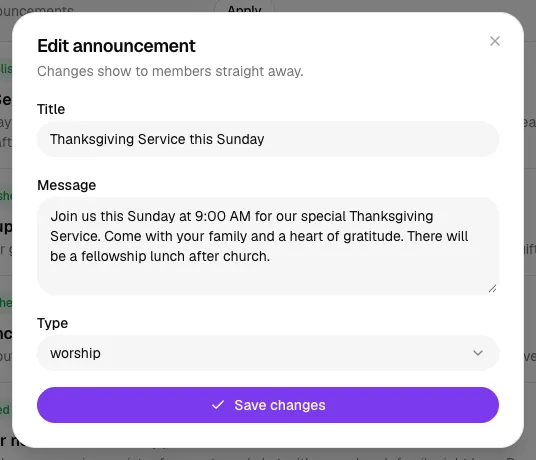
- Type a clear Title, for example "Thanksgiving Service this Sunday".
- Write the Message: what is happening, when and where, and what members should do.
- Choose a Type: announcement, event, donation, prayer, worship, giving or info. The type controls the small label and icon members see next to the announcement.
- Click Publish announcement.
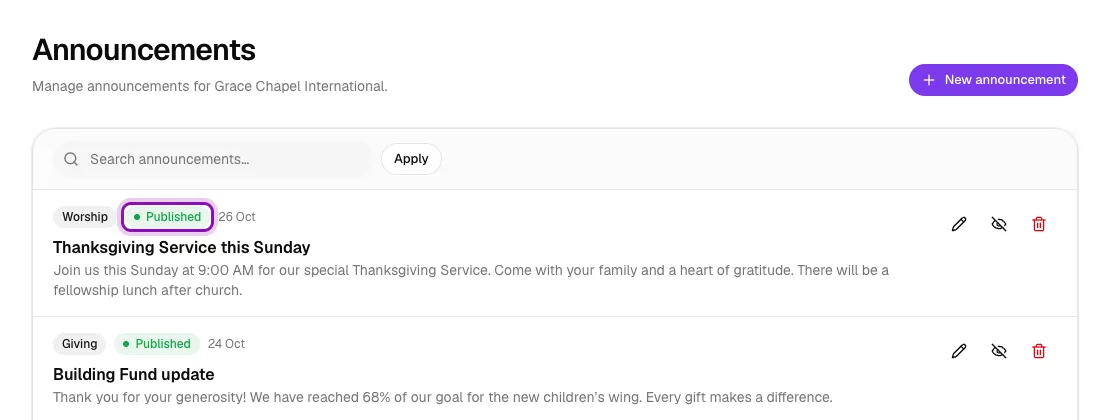
The announcement goes live straight away for all members of your church. It appears at the top of your list with a green Published badge.
Step 3: See what members see
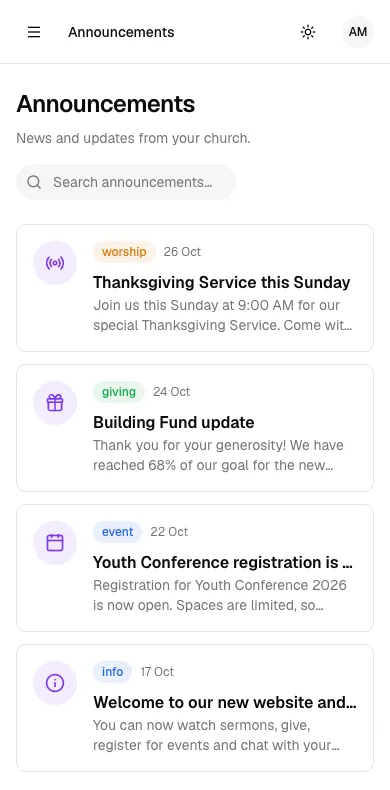
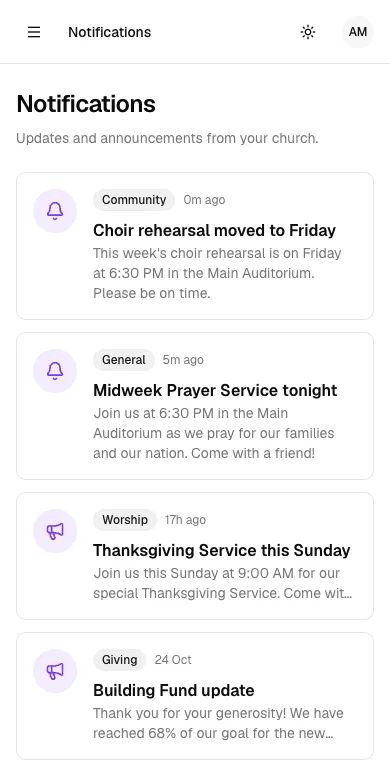
Members see your latest announcements on the church feed under Latest announcements. When they tap See all, they get the full Announcements page, with each announcement's type, date and message, and a search box. Announcements also appear on the member Notifications page.
Step 4: Edit, hide or delete an announcement
Each announcement has three buttons on the right:
- Pencil (Edit): fix a typo, change the time or switch the type. Click Save changes and members see the update straight away.
- Eye (Unpublish): hides the announcement from members without deleting it. It then shows as Draft. Click it again to publish it again. This is handy once an event has passed.
- Red bin (Delete announcement): removes it permanently. You will be asked to confirm, because this cannot be undone.

Step 5: Send a notification
Go to Communication → Notifications and click New notification. Fill in:
- Title and Message: keep the message to one or two short sentences.
- Type: general, sermon, event, live, community or giving.
- Audience: All members, or Specific group. If you choose a specific group, pick it in the Group box, for example Choir.
Click Send notification.
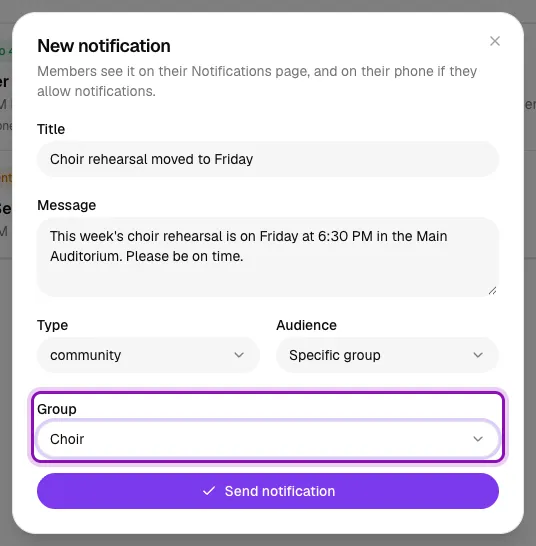
The notification is sent straight away. Members in the audience see it on their Notifications page, and members who have notifications switched on in the app also get it on their phone.
Step 6: Check who received it
Every notification is listed with its status. Sent to 8 members tells you how many people it reached. The line underneath shows the audience (all members or the group), how many phones received a push notification, and who sent it.
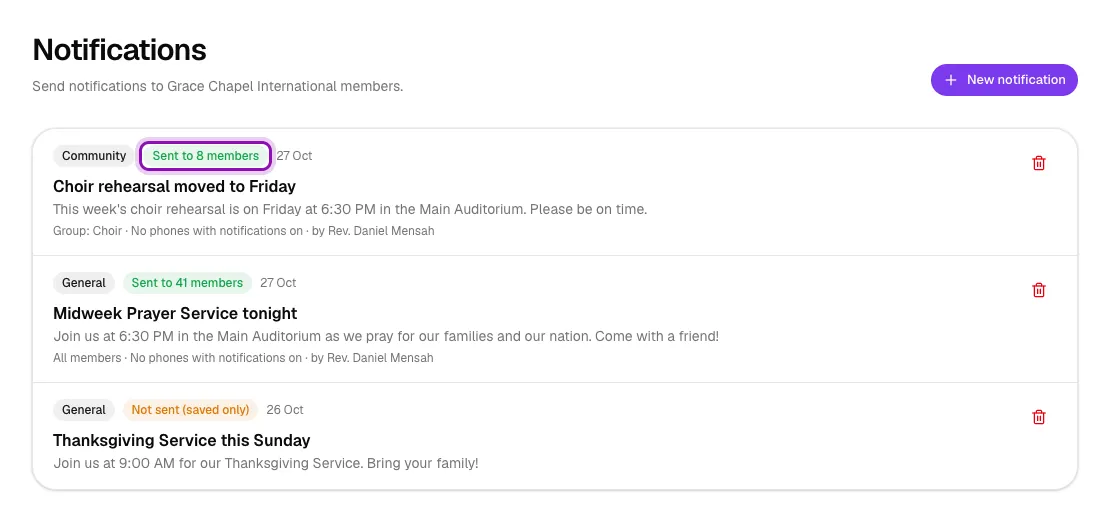
Older notifications that were saved before sending was available show Not sent (saved only). Use the bin to delete a notification from the list.
Here is how the notification looks on a choir member's Notifications page, together with your announcements:
Tips
- Put the most important detail in the title, for example "Service starts at 8:00 AM this Sunday".
- Use an announcement for news everyone should keep seeing on the feed, and a notification for a quick reminder or a message for one group.
- Unpublish announcements once they are out of date, so the feed always shows what is current.
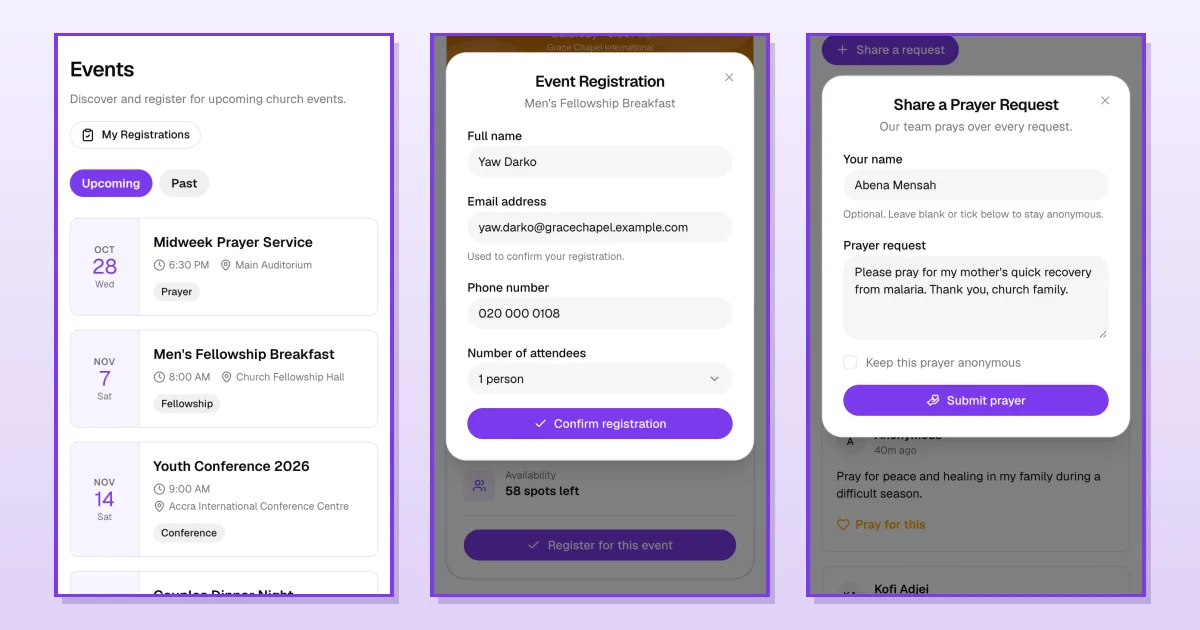
- For events where you need numbers, also create the event with registration turned on and mention it in your announcement.
Troubleshooting
I cannot see the "New announcement" or "New notification" button
Your role does not include permission to create them. Ask your church admin to update your role under Administration → Roles.
Members say they cannot see my announcement
Check that its status is Published. If it shows Draft, click the eye button to publish it again. Members may also need to refresh the page or reopen the app.
The notification says "No phones with notifications on"
The notification still reached your members' Notifications page. It just didn't go to any phone, because none of the members in the audience have switched on notifications in the app yet. Encourage members to allow notifications when the app asks.