Church chat lets members and staff message each other privately inside The Worship, without sharing personal phone numbers. You can chat one-to-one, create groups for ministries and teams, send photos, documents and voice notes, and (with permission) make audio and video calls. This guide covers chat for both members and church admins.
Before you start
- Who can chat: any active member of your church. You can only chat with people in the same church.
- Groups: creating a chat group needs the group-chat permission. Church admins have it; other staff get it through their role.
- Calls: starting audio or video calls also needs permission. Members who don't have it can still answer calls.
- Privacy: conversations are private. Admins cannot read chats they are not part of.
Step 1: Open Chat from the menu
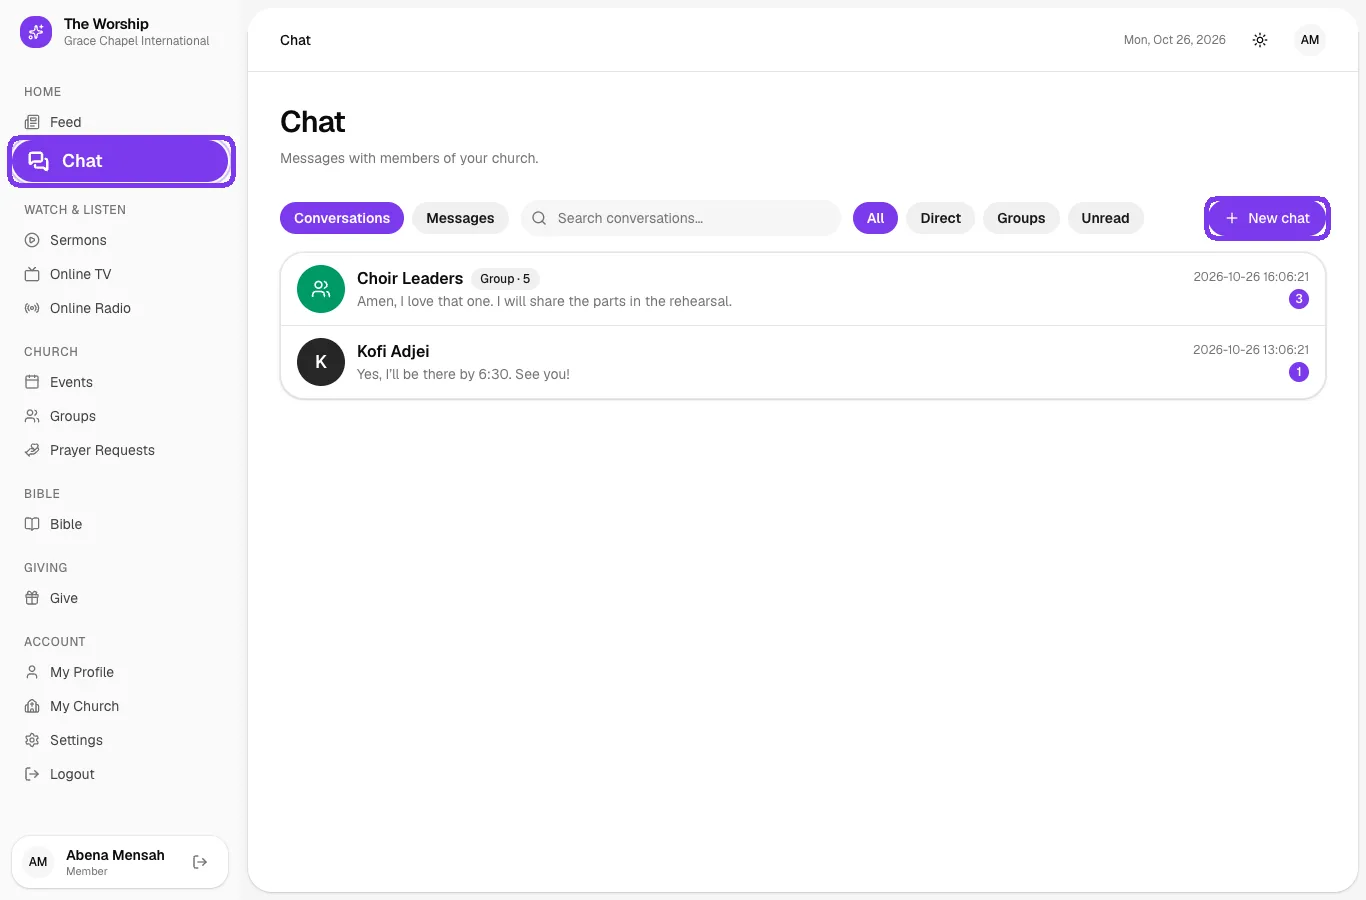
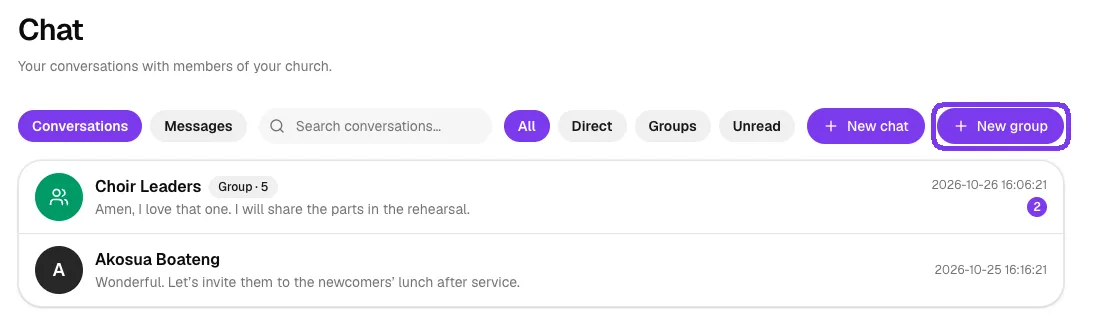
Click the purple Chat button in the menu. Members find it under Home; admins find it under Communication. The chat page lists your conversations, newest first, with a badge for unread messages. Use the filters (All, Direct, Groups, Unread) or the search box to find a chat. The Messages tab searches inside your messages.
Step 2: Start a new chat
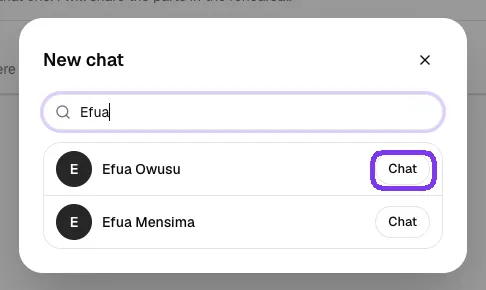
Click New chat and type at least two letters of a person's name. Click Chat next to the person you want. If you already have a conversation with them, it opens; otherwise a new one is created.
Step 3: Send messages, photos, files and voice notes
Type in the box at the bottom and click the send arrow. You can also:
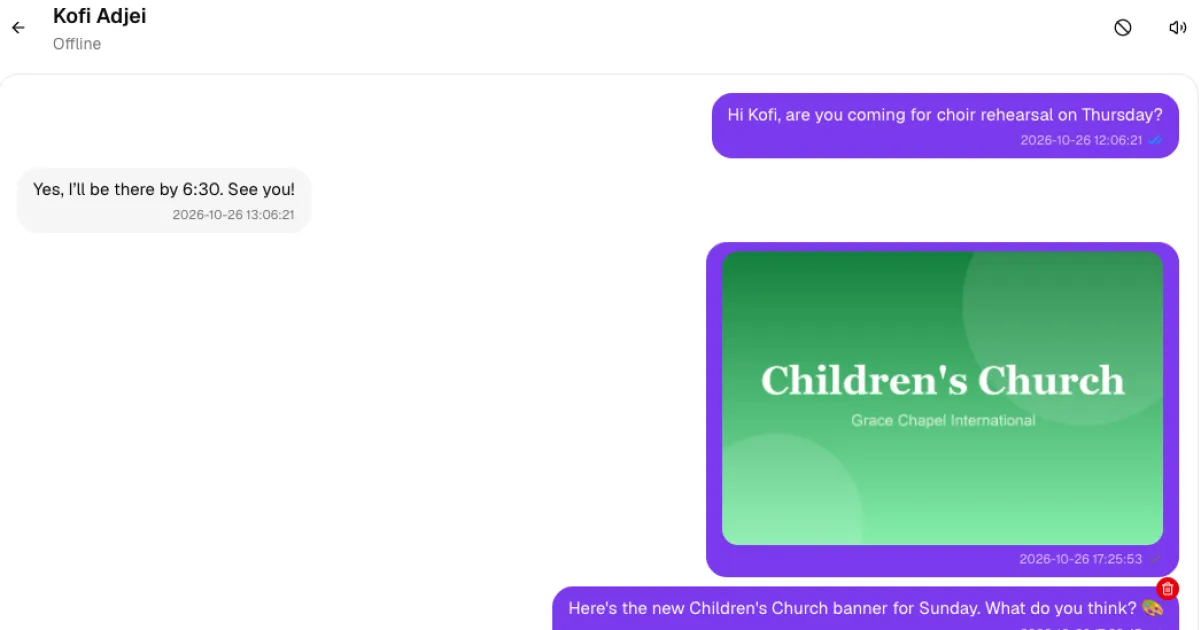
- Attach a file: click the paperclip to send a photo or a document (PDF, Word, Excel or text).
- Record a voice note: click the microphone, speak, then send or discard the recording.
- Delete a message: hover over one of your own messages and click the red bin.
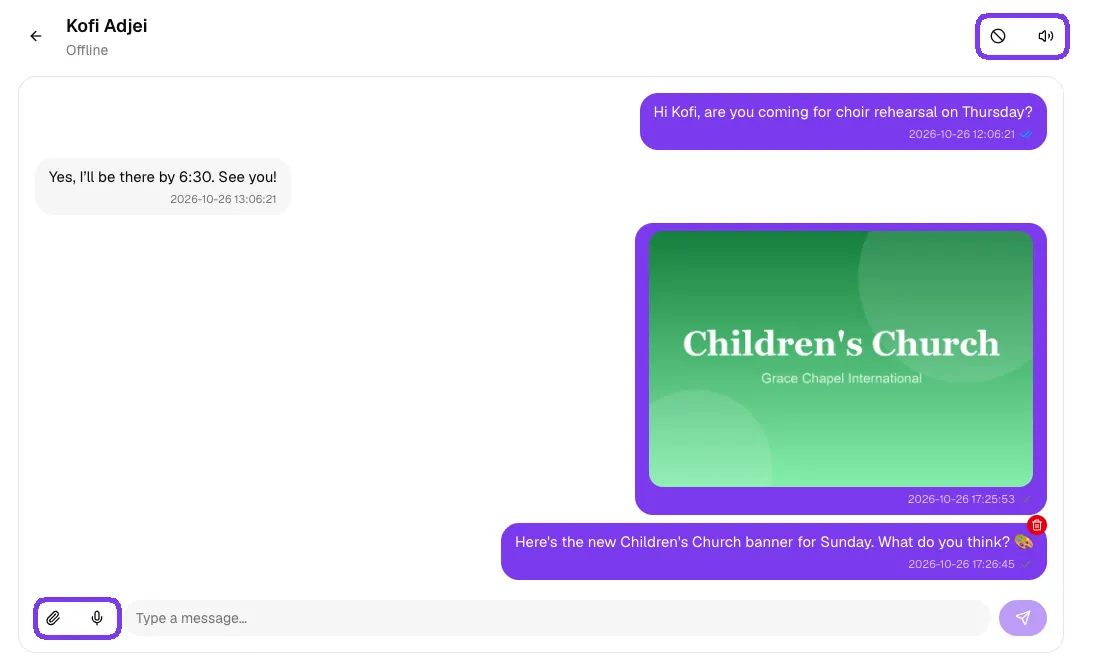
Ticks under your messages show what happened: one tick means sent, two ticks mean delivered, and coloured ticks mean the other person has read it.
Mute or block someone
At the top right of a conversation, the speaker button mutes it, so you stop getting notifications without leaving the chat. The circle button blocks the person; neither of you can message the other until you unblock them.
Step 4: Make an audio or video call
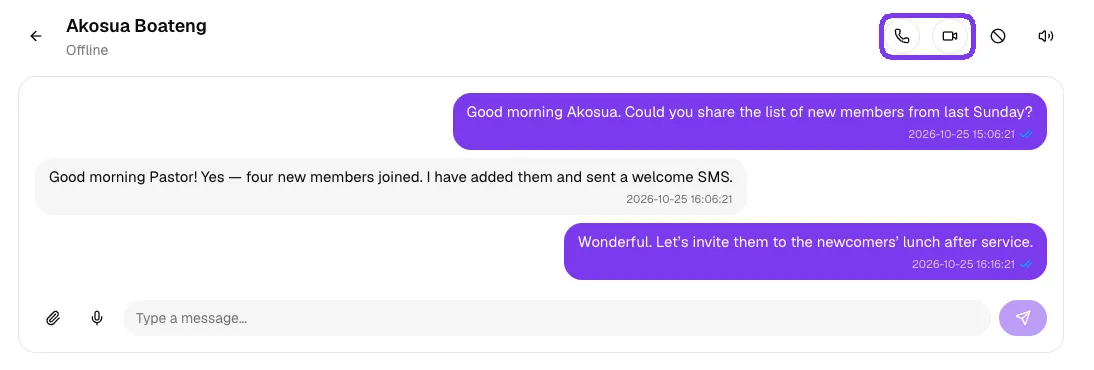
If your role allows calls, phone and camera buttons appear at the top of a conversation. Click the phone for an audio call or the camera for a video call. The other person sees an incoming call and can answer or decline. Your browser will ask for permission to use your microphone (and camera for video): click Allow.
Step 5: Create a group chat
Group chats are great for ministries, committees and teams. If you are allowed to create groups, a New group button appears next to New chat at the top of the chat page. Click it.
The New group window opens:
- Search for each person by name and click Add next to them. Added people appear as chips under the search box; click the small cross on a chip to remove someone.
- Type a Group name, for example Ushers Team.
- Click Create group. The new group opens straight away.
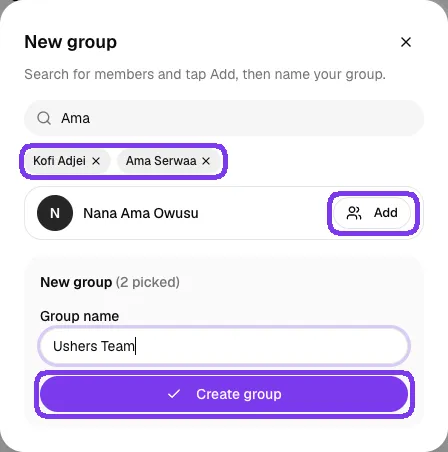
You can also start a group from New chat: click the people icon next to a name instead of Chat, then fill in the New group section at the bottom of the window.
Step 6: Manage group members
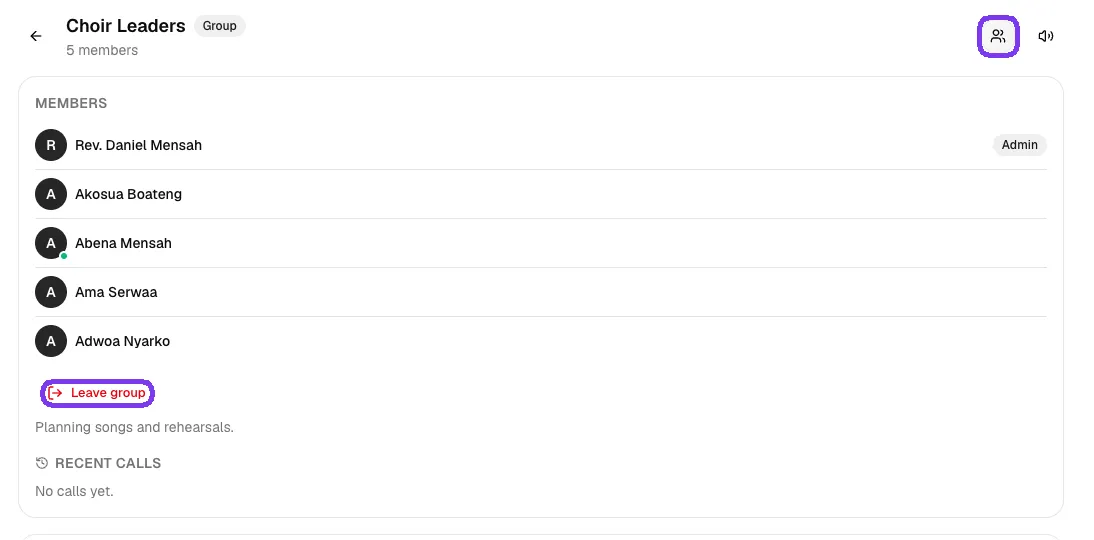
In a group, click the members button at the top right to see who is in it. Group admins can rename the group, add or remove people and make others admins. Anyone can click Leave group to leave.
Tips
- Mute busy groups instead of leaving them, so you can catch up later.
- Use a group for each ministry so announcements reach the right people.
- Keep personal phone numbers private: chat works without sharing them.
- Photos and files have size limits, and each member has a daily upload allowance.
Troubleshooting and FAQ
I can't find someone when I search.
You can only chat with active members of your own church. Check the spelling of their name, or ask the church office whether they've been added as a member.
Why don't I see the New group button?
Creating group chats needs the group-chat permission. Ask your church admin to add it to your role, or to create the group and add you to it.
Why don't I see the call buttons?
Starting calls needs permission from your church admin. You can still answer calls others make to you.
Can the church admin read my private messages?
No. Admins can only see conversations they are part of.