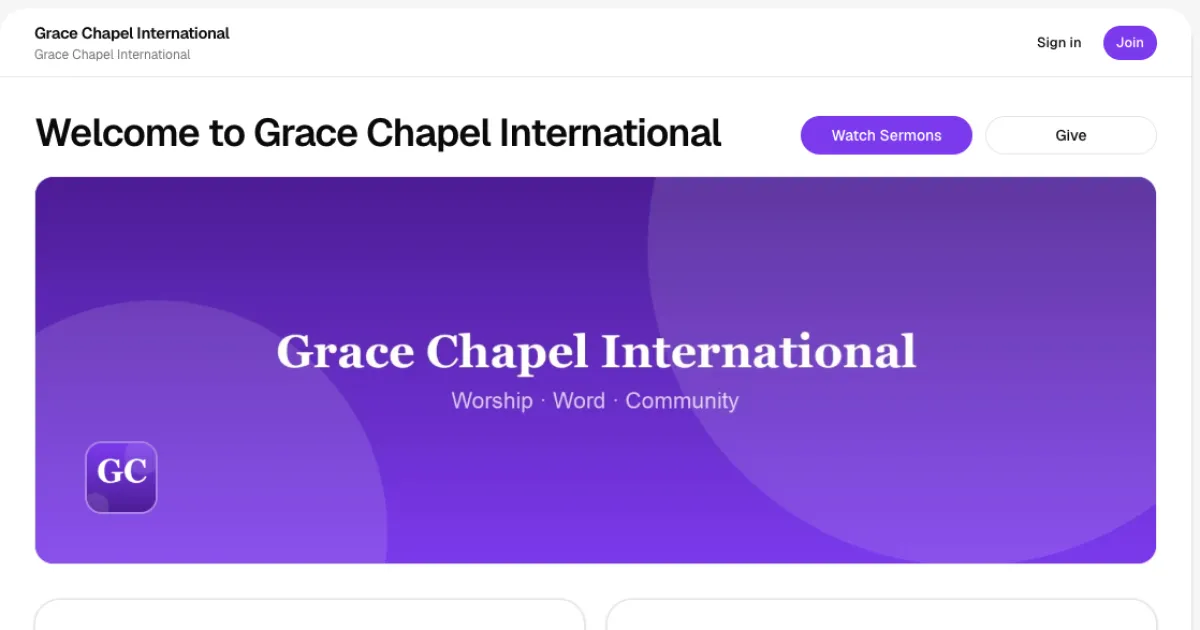
Your church settings control what visitors and members see on your public church page and in the app: your church name, a short description, contact details, social media links, logo, cover photo and colours. A complete, accurate profile also helps people find your church on Google. This guide shows you where each setting lives and how it appears on your page.
Before you start
- You need to be the church admin, or a staff member with "Update church settings". Staff with only "View church settings" can open the page but can't change the branding.
- For branding, have your logo ready as a JPG, PNG or WebP file up to 2 MB, ideally square. A wide cover photo can be up to 4 MB.
Step 1: Open Settings
In the left menu, go to Administration → Settings. The page has two tabs: General and Branding.
Step 2: Update your general information
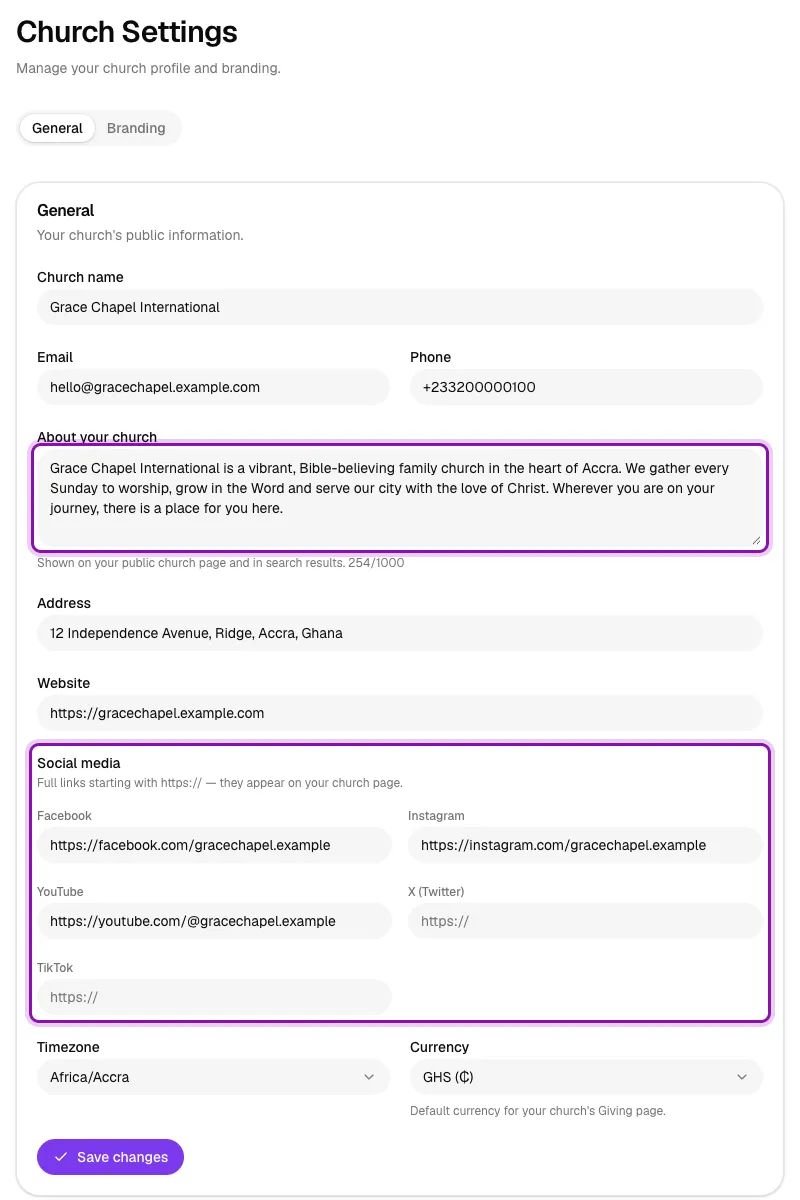
On the General tab, check and update:
- Church name: shown at the top of every page and in search results.
- Email and Phone: how visitors contact you. They appear on your public page and can be tapped to email or call.
- About your church: two or three sentences about who you are and when you meet (up to 1,000 characters). It is shown on your public church page and used in search results.
- Address: your full street address, area and city, for example "12 Independence Avenue, Ridge, Accra, Ghana".
- Website: if you have one. It must start with https:// or http://.
- Social media: the full links to your Facebook, Instagram, YouTube, X (Twitter) and TikTok pages, each starting with https://. Leave any you don't use empty. They appear as buttons on your church page.
- Timezone: for churches in Ghana this is Africa/Accra. Event and service times are shown in this timezone.
- Currency: the default currency on your Giving page, for example GHS (₵).
Click Save changes. You will see "Church settings updated."
Step 3: Add your logo, cover photo and colours
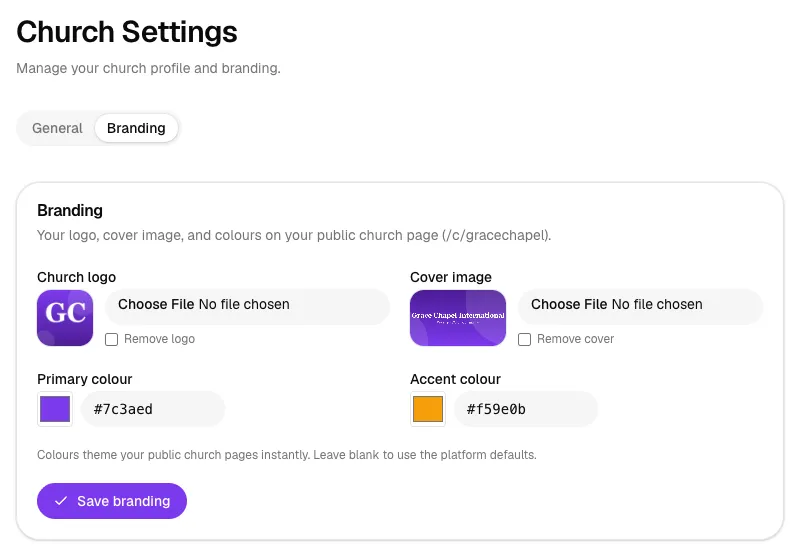
Open the Branding tab:
- Church logo: click Choose File and pick your logo. A preview appears beside it.
- Cover image: a wide photo or banner shown at the top of your church page.
- Primary colour and Accent colour: click the colour box or type a colour code such as #7c3aed. Leave them blank to use the platform defaults.
The card shows the address of your public church page, for example /c/gracechapel. Click Save branding. Your colours theme your public church pages straight away. To remove an image, tick Remove logo or Remove cover and save.
Step 4: See how your page looks
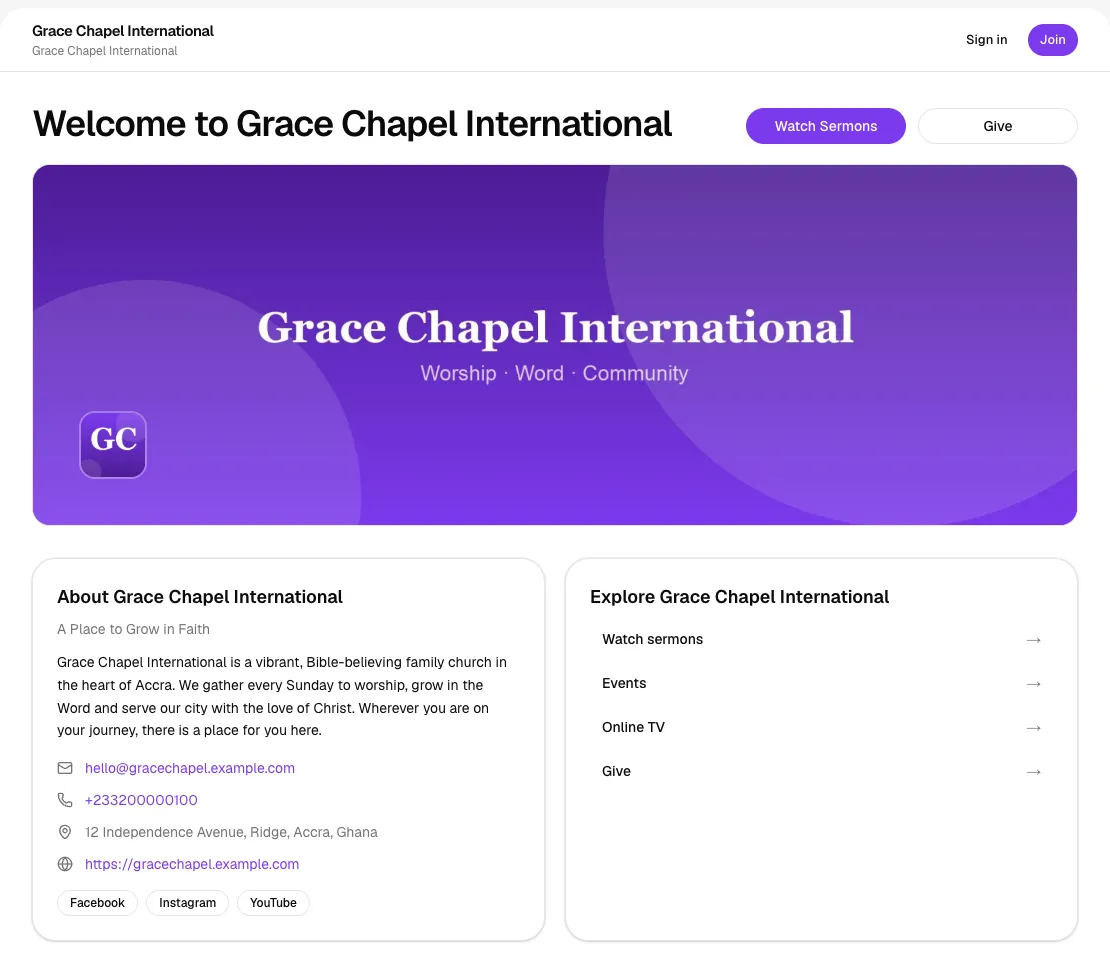
Click View site in the top bar of the admin area. Your public church page opens in a new tab.

Your cover image and logo appear at the top. The About card shows your description, email, phone, address and website, with a button for each social media page you added. Visitors see the same page whether or not they are signed in, with buttons to watch sermons, give, see events and watch Online TV.
How your settings help people find you on Google
The Worship uses your church name, description, address, phone, website, social media links, logo and cover image to describe your church to search engines. That makes searches like "your church name Accra" more likely to show your page with the right details. To get the most out of it:
- Use your church's full, official name.
- Write a clear About your church text that says who you are, where you are and when you meet.
- Add your social media pages so search engines can connect them to your church.
- Fill in the complete address, including the area and city.
- Upload a clear logo and a good-quality cover photo.
- Keep your phone and email up to date so visitors can reach you.
Tips
- Use a square logo (for example 512 × 512 pixels) so it looks sharp in the round and square spaces it is shown in.
- For the cover image, choose a wide photo (about 1600 × 600 pixels) without important text near the edges, so it crops well on phones.
- Pick a primary colour dark enough for white text to be readable on buttons.
- Uploaded logos and covers count towards your church's storage allowance, which you can see on your dashboard.
Troubleshooting
"Check the highlighted fields."
One of your images is too large or not a JPG, PNG or WebP file, or a colour code isn't valid. Colour codes look like #7c3aed.
My website or social media link won't save.
Include the beginning of the address, for example https://gracechapel.org, not just gracechapel.org. Social media links must start with https://, for example https://facebook.com/yourchurch.
Event times look wrong.
Check that the Timezone on the General tab is correct (Africa/Accra for Ghana) and save.