Before your church can send SMS under its own name, or receive online gifts straight into its own merchant account, The Worship needs to verify who is behind the church. This is called KYC ("know your customer"). One short application covers both: the SMS Sender ID and payment merchant onboarding. The platform team reviews each part separately. This guide walks you through the application and explains every status you might see.
Before you start
- You need to be the church admin, or a staff member whose role allows managing settings or applying for SMS.
- Decide whether you are applying as an Individual (for example the head pastor) or as a Business / Church Organization (a registered body).
- Have your documents ready as JPG, PNG or PDF files of up to 5 MB each:
- Individual: a Ghana Card or passport, and a photo of you holding the ID beside your chest.
- Organization: your business registration document, business registration certificate and Form A.
- Optional for both: proof of address. Organizations can also add directors' IDs and a representative authorization letter.
Step 1: Open the Verification page
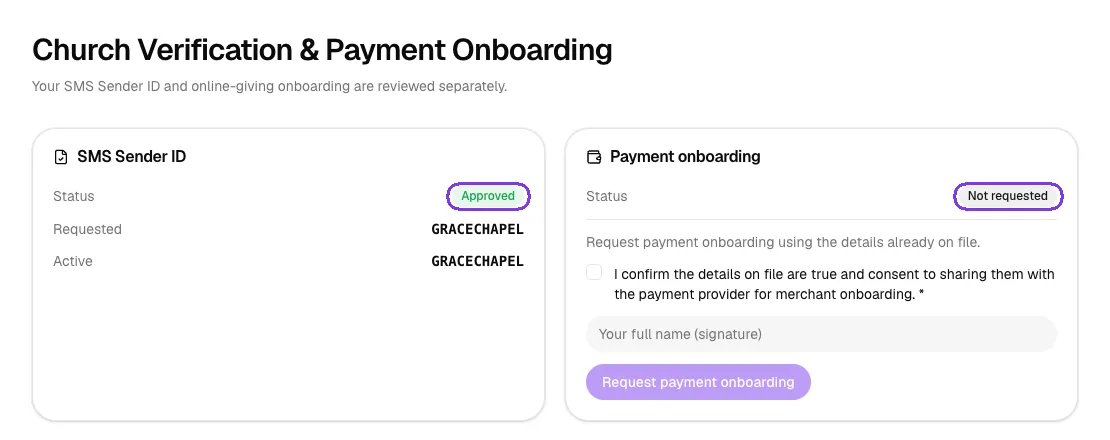
In the left menu, go to Administration → Verification. If your church has not applied yet, click Start application. Once you have applied, this page shows the status of each part: your SMS Sender ID on the left and payment onboarding on the right.
Step 2: Choose what you are applying for
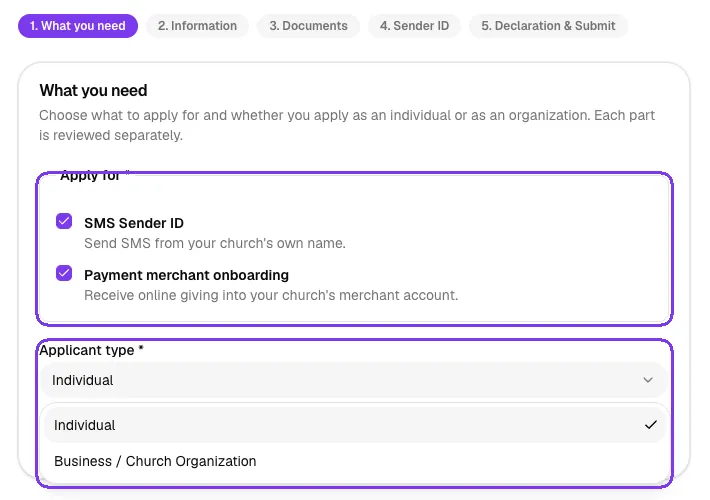
The application has five steps, shown as pills at the top. On 1. What you need, tick one or both options:
- SMS Sender ID: send SMS from your church's own name.
- Payment merchant onboarding: receive online giving into your church's merchant account.
Then pick the Applicant type (Individual, or Business / Church Organization) and click Continue.
Step 3: Fill in your information
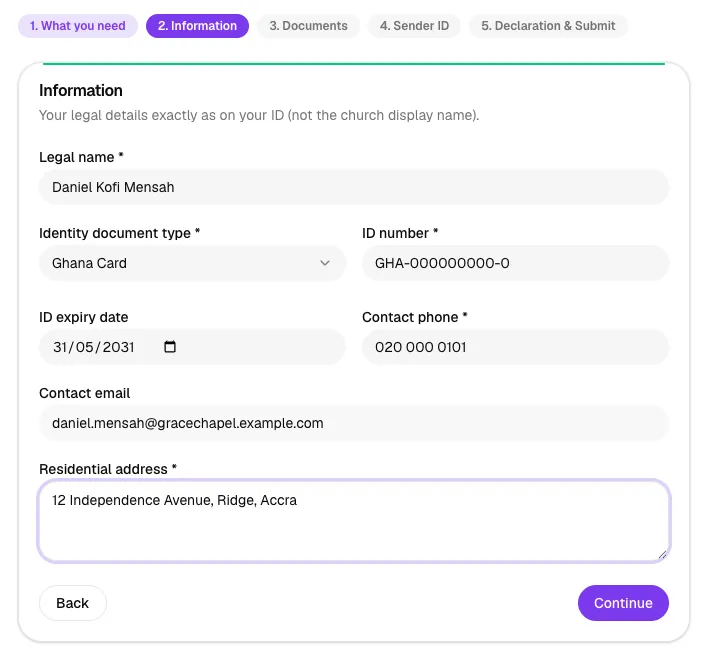
For an Individual, enter your legal name exactly as it appears on your ID (not the church's display name), the ID type and number, the ID expiry date, a contact phone and email, and your residential address. When you apply for payment onboarding, the ID number, contact phone and address become required.
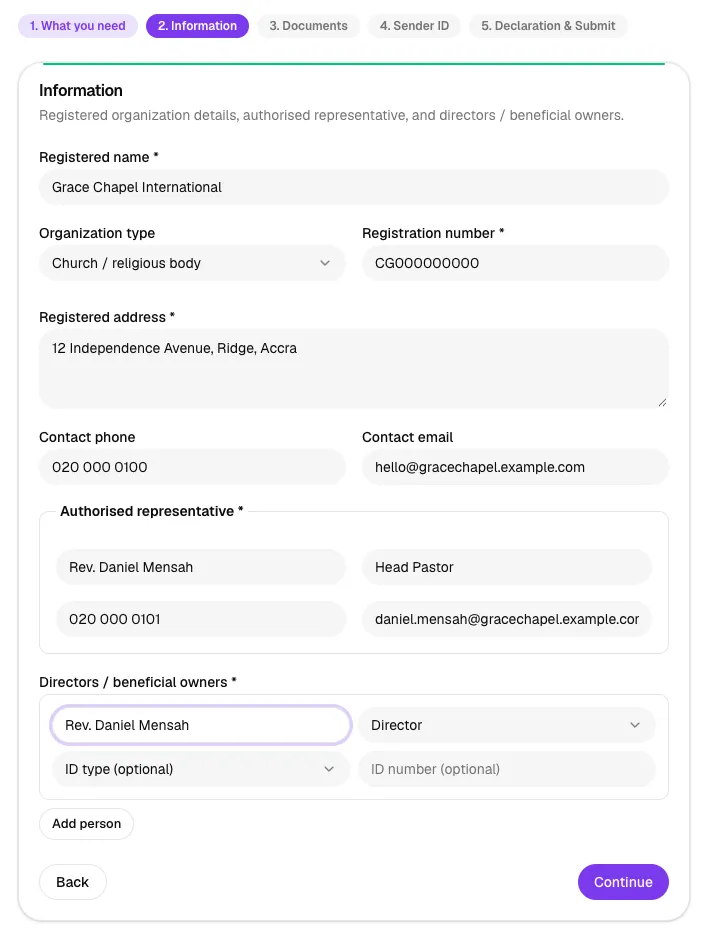
For an Organization, enter the registered name, organization type, registration number and registered address, your contact details, the authorised representative (name, role, phone and email), and at least one director or beneficial owner. Use Add person to list more people.
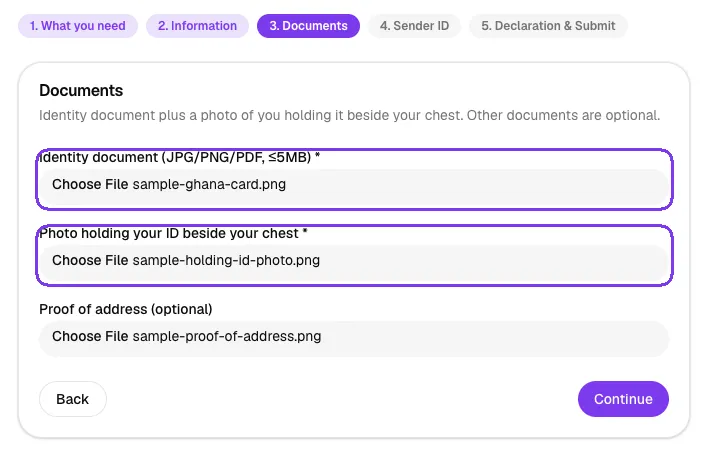
Step 4: Upload your documents
Click each Choose File box and select the matching document. Individuals upload the identity document and the photo holding the ID. Organizations upload the business registration document, the certificate and Form A. Proof of address is optional.
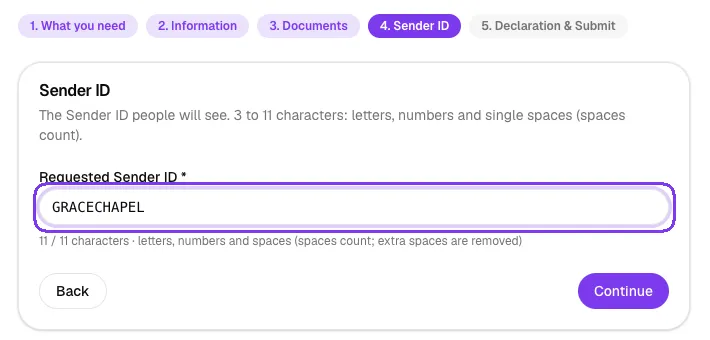
Step 5: Choose your Sender ID
If you are applying for SMS, type the name people will see when your SMS arrives. It must be 3 to 11 characters long, using letters, numbers and single spaces. Spaces count as characters, and the counter below the box shows how many you have used. If you only applied for payment onboarding, this step is skipped.
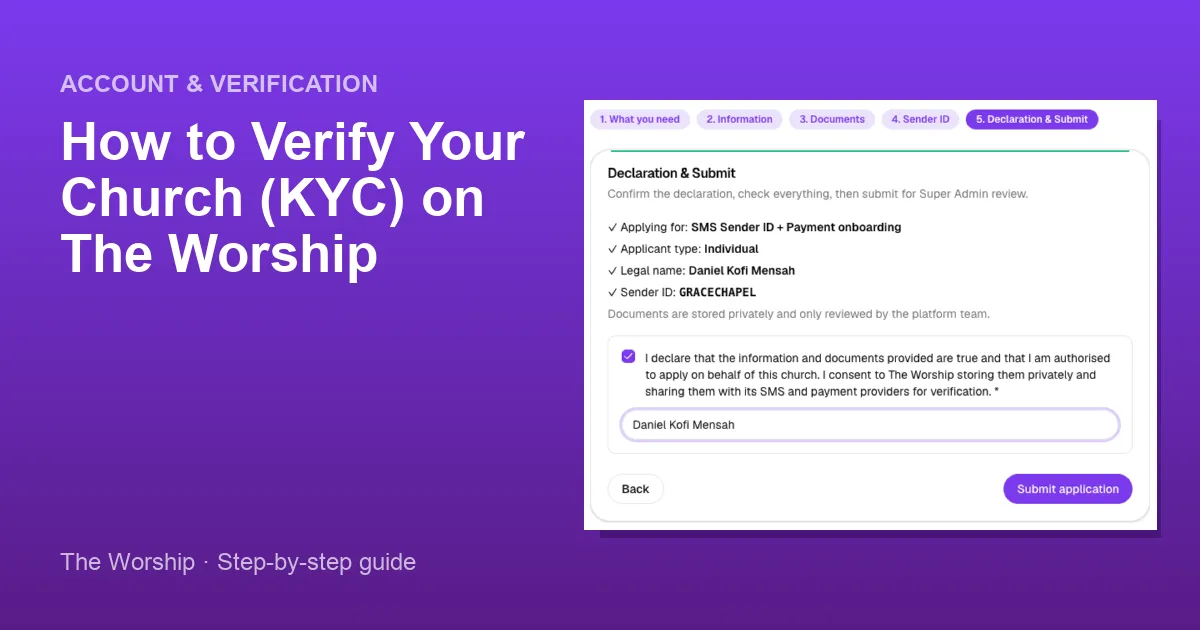
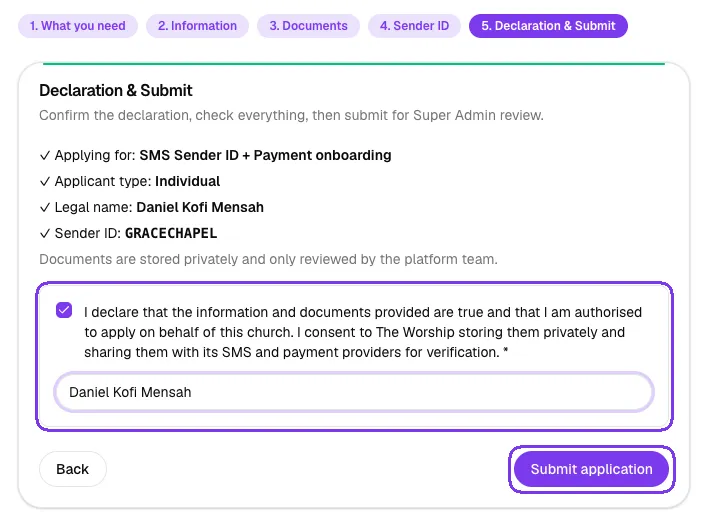
Step 6: Sign the declaration and submit
Check the summary, then tick the declaration confirming that the details are true and that you are authorised to apply for the church. Type your full name as your signature and click Submit application. The button only becomes active once the declaration is ticked.
Step 7: Follow your application's status
Back on the Verification page, each part you applied for shows Pending review while the platform team checks it.

These are the statuses you may see:
- Pending review: waiting for the team.
- Requires correction: the team left a note telling you what to fix.
- Approved: this part is done.
- Rejected: the reason is shown on the card.
- Submitted to provider or Suspended: these apply to payment onboarding only.
If a part requires correction, read the note on the card. It tells you exactly what the reviewer needs.
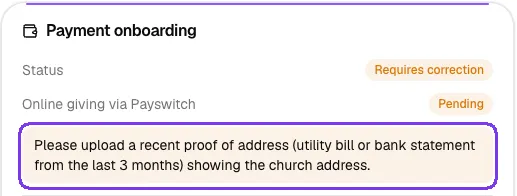
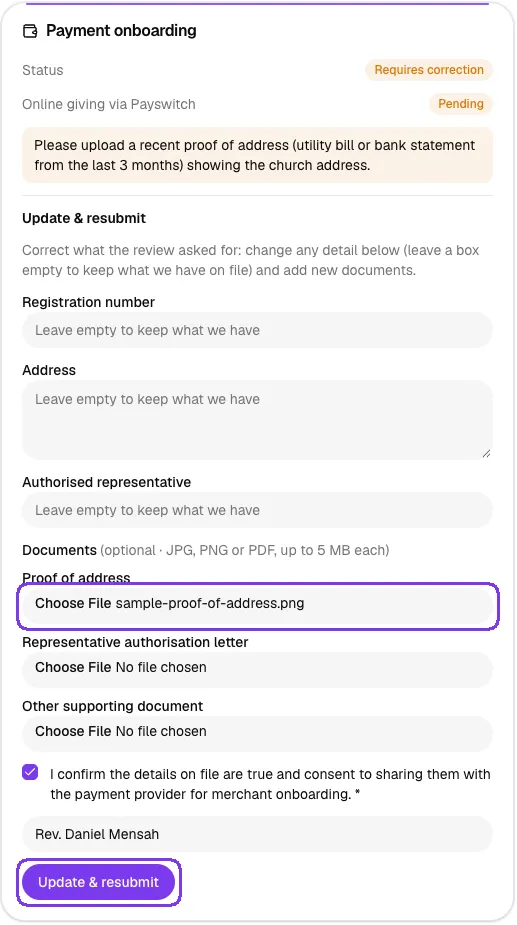
For payment onboarding, the card opens an Update & resubmit form right below the note:
- Change only the details the reviewer asked about, such as the Address. Leave a box empty to keep what is already on file.
- Under Documents, add any new file they asked for: Proof of address, Representative authorisation letter (organisations) or Other supporting document. JPG, PNG or PDF files of up to 5 MB each are accepted.
- Tick the confirmation, type your full name as your signature and click Update & resubmit. The status changes back to Pending review.
For the SMS Sender ID, click Update & resubmit on its card to open your application again, make the changes and submit it.
Step 8: Add the other part later
Applied for only one part? You don't need to start over. The Verification page lets you request a Sender ID, or payment onboarding, using the details already on file. Just confirm and sign.
What happens after approval
- SMS Sender ID approved: your Sender ID becomes active, and your church's SMS go out under that name.
- Payment onboarding approved: once the platform team activates your merchant account, the card shows Online giving via Payswitch: Active, and online gifts go straight to your church's own merchant account.
Tips
- Use your legal name and your ID number exactly as they appear on the document.
- Take the photo of you holding your ID in good light, with your face and the ID both clear.
- Choose a Sender ID your members will recognise, such as your church's short name.
Troubleshooting and FAQ
Who can see my documents?
Your documents are stored privately and reviewed only by the platform team. By signing the declaration, you agree that they may be shared with The Worship's SMS and payment providers for verification.
The Submit application button won't click.
Tick the declaration box first. If an error list appears, fix each item it mentions and submit again.
How long does a review take?
The platform team reviews each part separately. Keep an eye on the Verification page, where every status change shows up.